
Easter Bunny Template: Paper crafting for Easter
Easter is just around the corner, and what better way to celebrate the season than by crafting a charming paper Easter bunny! In this step-by-step guide, we'll walk you through the process of creating an adorable paper bunny that will bring joy to your Easter festivities.

Step 1: Print the Template
Start by printing the Easter bunny template using a color printer. This ensures that the pink parts for the ears and nose are in the correct hue, adding a touch of vibrancy to your creation.
Step 2: Prepare Your Materials
Gather all the necessary materials – scissors, glue, and the printed template. Having everything in place will make the crafting process smooth and enjoyable.
Step 3: Cut Out the Shapes
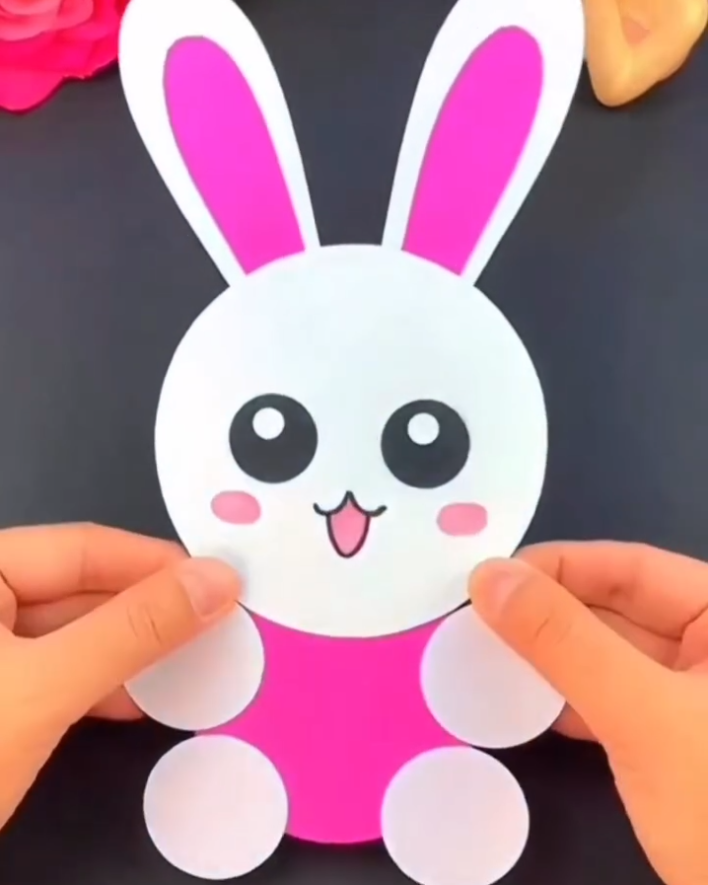
Carefully cut along the outlines of each shape on the template. You should have a large circle for the head, a medium pink circle for the body, four small circles for the arms and legs, two ovals for the ears, and additional shapes for the inner ears and eyes. Take your time with this step to ensure precise shapes.
Step 4: Assemble the Body
Take the medium circle and attach the four smaller circles to the sides and bottom edge to form the arms and legs using glue. This simple assembly sets the foundation for your paper bunny.

Step 5: Create the Head
Glue the large circle onto the top of the medium circle to form the head. Add the eyes to the head. Attach the pink inner ear pieces to the outer ears, then attach the ears to the top of the head.


Step 6: Add Facial Features
Use a black and pink markers or crayons to draw and fill in the mouth. This step brings your bunny to life, giving it a personality of its own.
Step 7: Final Assembly
Once all the parts are cut and the facial features are drawn, assemble all pieces by gluing them into their respective places on the body and head. Take your time with this step to ensure that everything aligns perfectly.
Final Touches:
If you have any additional decorative materials like ribbons, stickers, or glitter, you can add these to give your Easter bunny a personal touch.
For a more three-dimensional look, you could use foam squares or rolled up pieces of tape to give the eyes and ears a slightly raised effect.


Step 8: Drying
Allow your Easter bunny to dry completely before moving it. This prevents any parts from shifting or coming loose.
Step 9: Display
Your paper Easter bunny is now complete and ready for display! Place it on your Easter table, mantle, or any other festive spot to spread the joy of the season.
Crafting a delightful paper Easter bunny is a fun and creative way to add a touch of handmade charm to your Easter celebrations. Whether you're making it as a solo project or with friends and family, the process is sure to bring joy and laughter. Happy crafting!


